The LCD screen on a resin printer is a consumable, not a permanent component. Mono LCDs are rated for around 2 000 hours of cure time. That is roughly a year of heavy printing, two years of moderate use, or three or more years for a hobbyist running a few prints a week.
Most owners do not realise this until the screen starts failing in subtle ways: creeping adhesion problems that get blamed on the resin, faint patches across cured layers, exposure times that no longer dial in no matter how much adjustment you throw at them. The screen does not announce its own death. It just quietly degrades, and everything it touches starts to look like your fault.
This article covers how to spot a tired screen, how to rule out other causes, what replacement actually costs, and when to swap the screen versus buying a new printer.
What a mono LCD actually does
The LCD in a resin printer is the exposure source. It sits between the UV light array below and the resin-filled VAT above. Each pixel in the LCD either opens or closes to let UV through, building up the cured layer pattern one slice at a time.
Mono LCDs replaced the older RGB LCD design several years ago. Mono panels pass more UV per pixel, which is why cure times dropped from ten seconds or more to under two seconds on modern machines. The trade-off is that mono LCDs still wear. The rated lifespan of 2 000 hours reflects the point at which the manufacturer expects performance to degrade meaningfully, not the point at which the screen stops working entirely. In practice, screens often continue to print past the 2 000-hour mark, with gradually shifting exposure requirements and eventually visible artefacts.
What a tired screen looks like
Screen degradation rarely announces itself as a total failure. It shows up in three ways, roughly in the order they appear as a screen ages.
Creeping first-layer adhesion problems. Prints that used to stick reliably to the build plate start failing at the base. The screen is still curing, but the intensity has dropped enough that the first layers are coming out softer than they should. Owners blame the resin, the FEP, or the levelling. They follow the FEP replacement guide, swap the resin bottle, and re-level the plate. Nothing helps for long. If adhesion problems return quickly after you have ruled out those causes, the screen is worth investigating.
Patches in the cured layer. Small regions of a print where the cure is uneven or weak. This happens when groups of LCD pixels have degraded to the point that they are passing less UV than the surrounding pixels. The print looks like it has soft spots or low-resolution patches rather than a consistent surface. Under magnification on miniatures, the detail quality in the patchy areas will look noticeably worse than the surrounding areas.
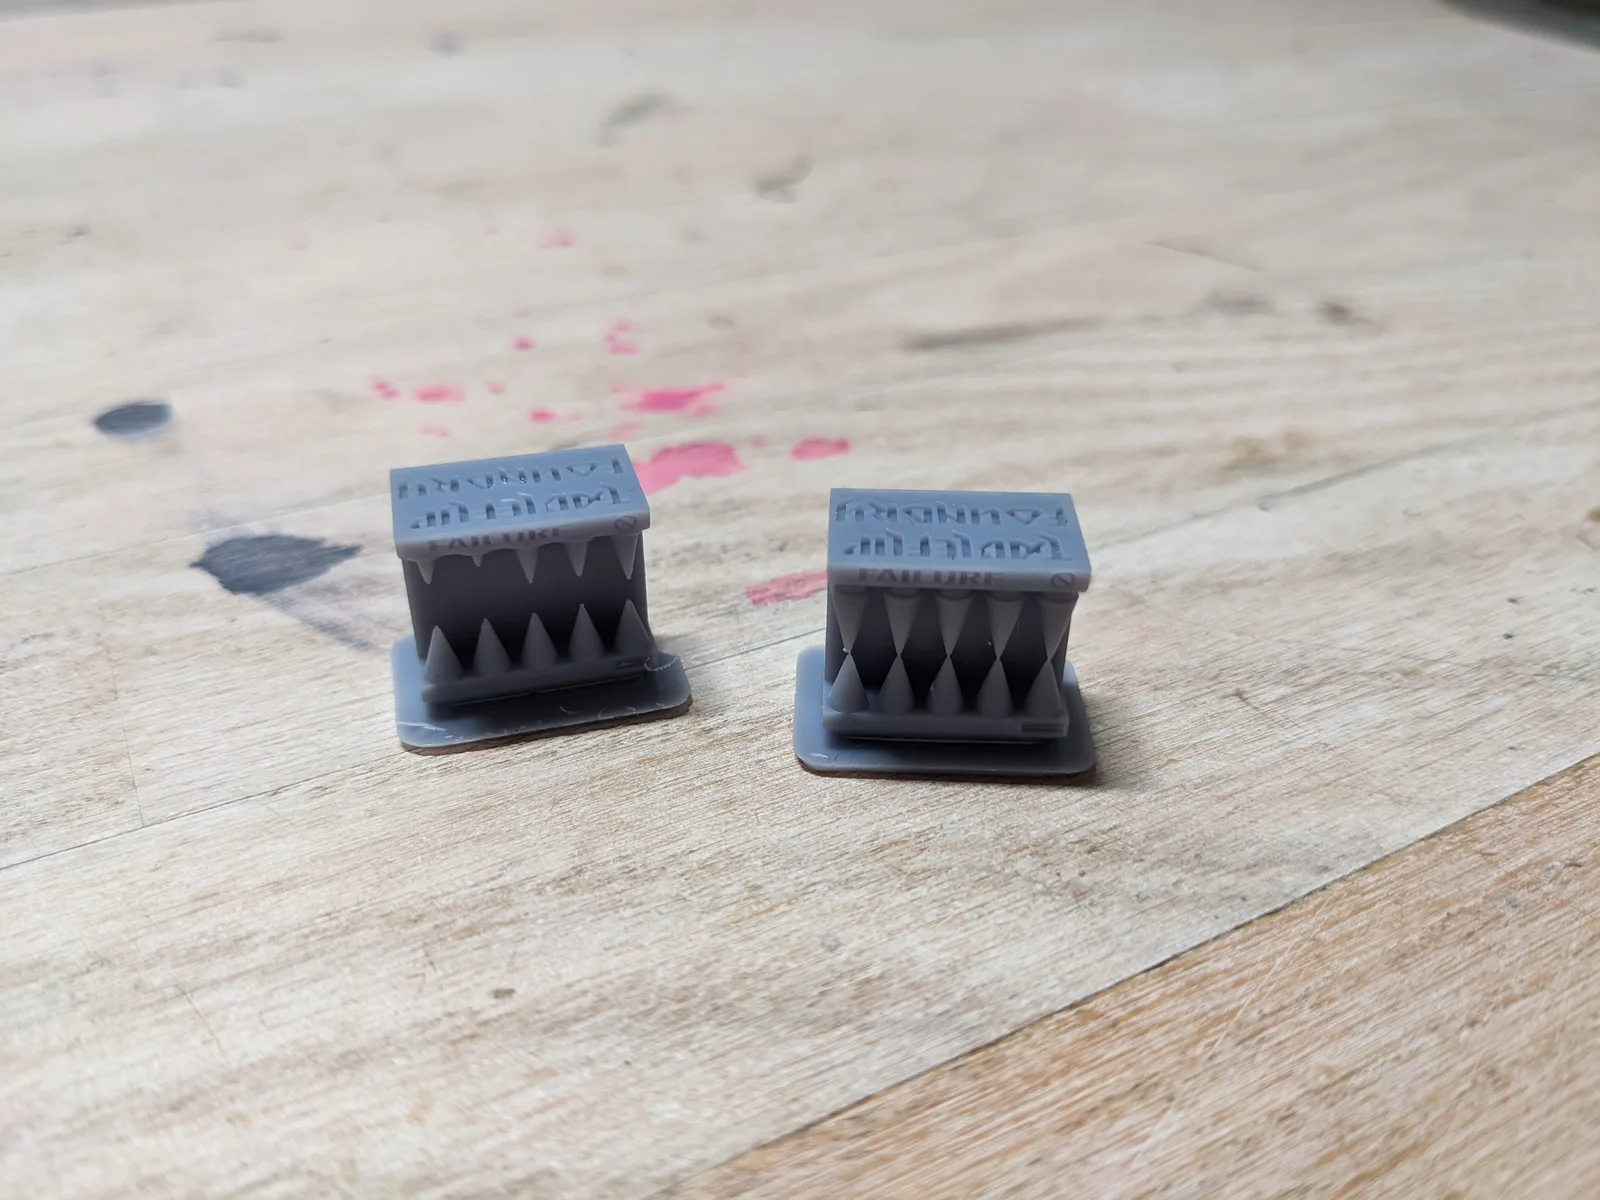
Exposure times that no longer dial in. This is the clearest sign of a failing screen. When you run an exposure test such as a RERF or Cones of Calibration, no exposure time in the range produces a clean print. Everything is either over or under. The RERF article describes what a normal calibration result looks like; if every result looks wrong across the full range, the problem is not the resin or the settings.
Run the diagnostic checks first
Before assuming screen failure, work through a short checklist. All three of the symptoms above can also appear from other causes, and ruling those out is faster and cheaper than a screen replacement.
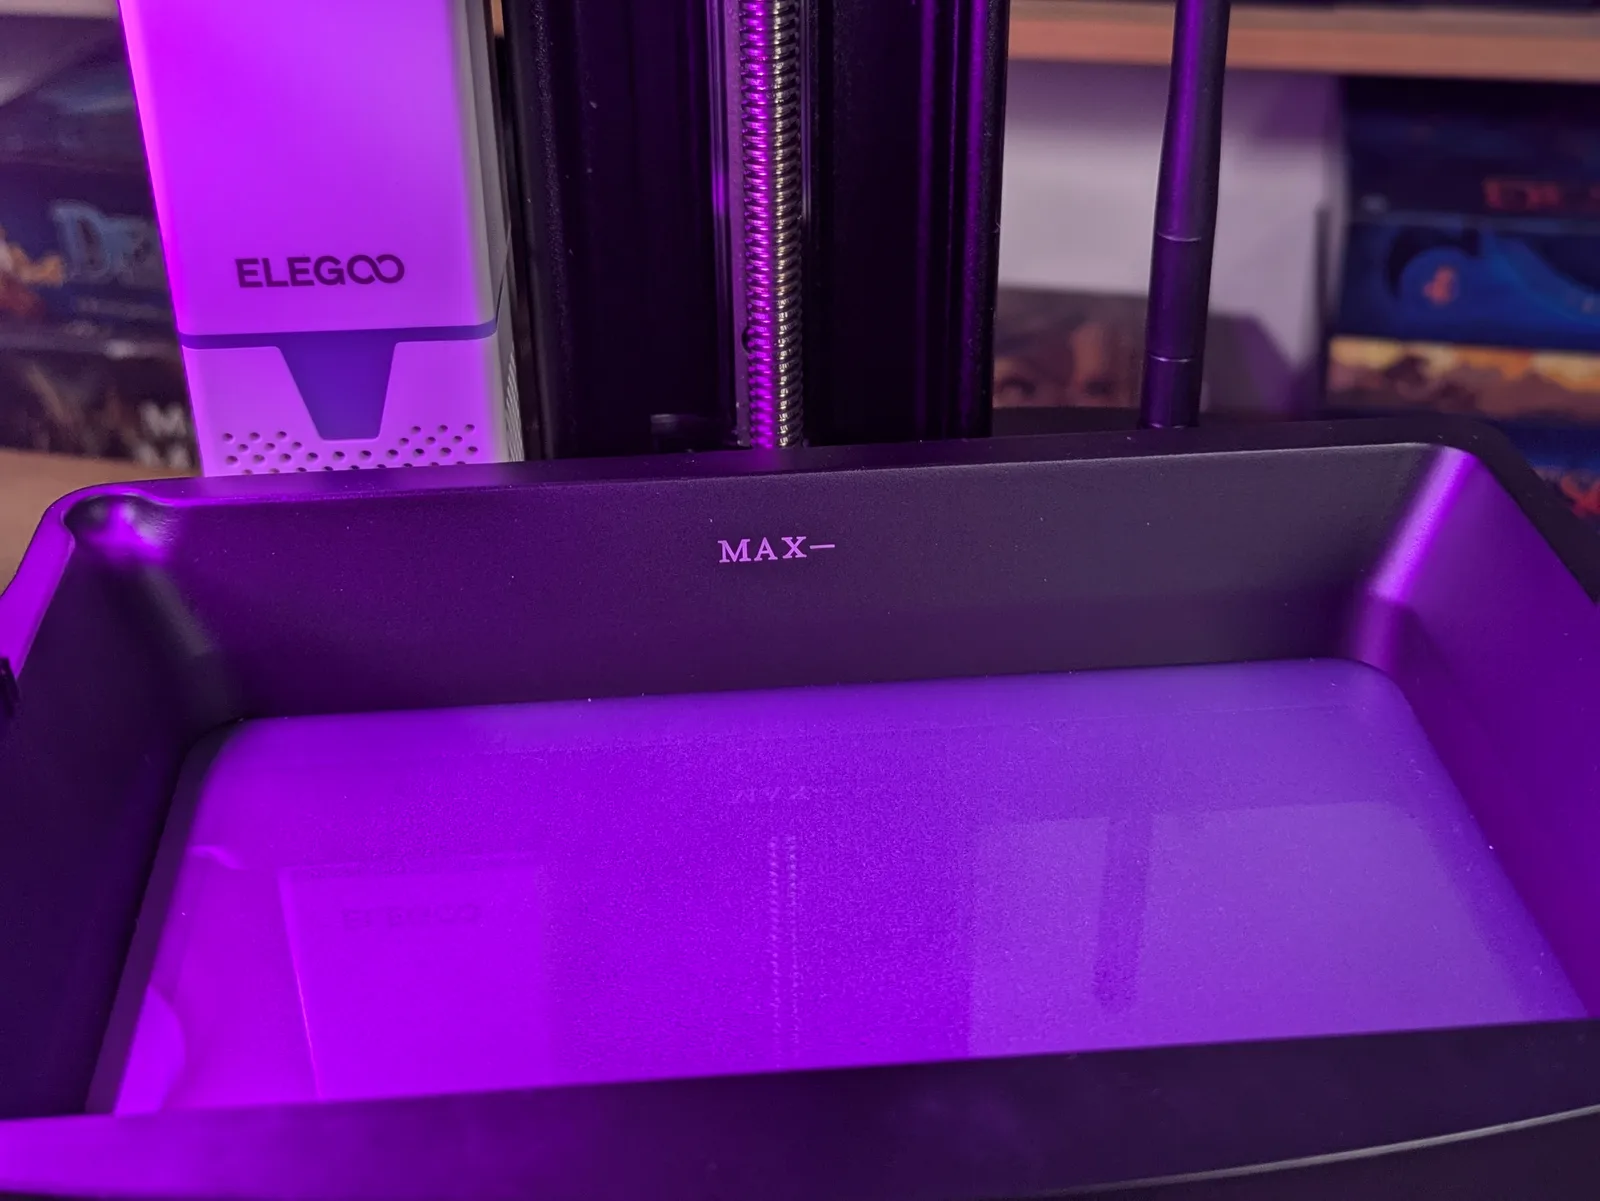
Run a screen exposure test. Most printers have a test mode that illuminates the full screen at maximum exposure. Place a blank sheet of white paper directly on the screen surface and run the test for a few seconds. The paper will show the exposure pattern. Look for dark patches, faint regions, or uneven illumination across the screen. A healthy screen will show even brightness across the whole panel. Dead or dying pixel groups show up as noticeably darker areas.
Replace the FEP first. A worn FEP produces symptoms nearly identical to early screen degradation: adhesion problems, uneven surfaces, soft layers. A replacement FEP costs between $5 and $10 depending on the printer. If the FEP is more than a few months old and you print regularly, replace it before spending further time on the screen diagnosis. The FEP replacement guide covers the full process.
Re-level the build plate. A plate that is not sitting level in the machine mimics adhesion problems convincingly. Re-level the plate and run a test print before drawing any further conclusions.
If you have replaced the FEP, re-levelled the plate, and the screen test shows dark patches, you have your answer.
What replacement actually costs
LCD replacement costs vary considerably depending on the printer. Common machines in the Elegoo Mars and Saturn range typically sell replacement screens for between $30 and $50. Mid-range machines from Anycubic or Phrozen sit in the $50 to $80 range. Premium machines, particularly larger-format printers with high-resolution panels or speciality sizes, can run to $100 or beyond.
The screen itself is the main cost. The replacement also requires some care with the ribbon cable connector, but there are no additional parts to buy for a standard replacement. Anyone who has changed a FEP will find the process manageable.
Before ordering a screen, confirm that the manufacturer or a reputable third party still stocks the part for your specific model. Older or discontinued machines are sometimes unsupported. If you cannot source a replacement panel, the replacement path closes.
The replacement decision tree
Three questions, in order.
Is the screen genuinely failing or has it just degraded? A screen that still produces usable prints at extended exposure settings is degraded but not dead. It is perfectly reasonable to keep running a degraded screen until it stops working, provided the prints are still acceptable. The useful threshold is when visual artefacts appear in finished prints or when the exposure test shows clear dark patches. Degraded-but-functional is not an emergency. Artefacts and dead patches are.
Does the manufacturer still sell the part? Check this before deciding on replacement. An unsupported machine with a dead screen is not a replacement candidate; it is a machine that has reached end of life.
Is the rest of the machine worth the screen? A screen replacement on a two-year-old printer in otherwise good condition is a straightforward yes. On a five-year-old machine that has been used heavily, the screen is one of several components that are all carrying age. The UV light source, the FEP mechanism, the Z-axis leadscrew, the control board: all of them have a lifespan too, and none of them is as easy or cheap to replace as the screen. If the rest of the machine has had a hard life, the replacement printer is often the better answer. The best resin printer for miniatures guide covers the current field if you reach that point.
What to expect from the replacement procedure
This article does not walk through the full step-by-step replacement. That process varies enough between printer models that a per-printer guide is more useful than a generic one. What to expect at a high level:
- Drain the VAT and remove it. The screen is underneath the VAT, and you need clear access.
- Remove the existing screen. On most printers this involves removing a few screws and disconnecting a ribbon cable. The ribbon cable connector is the part that needs care. It is fragile, and forcing it in the wrong orientation can damage the connector permanently.
- Install the new screen and reconnect the cable in the correct orientation.
- Run a test print to confirm the screen is functioning.
- Re-calibrate exposure times from scratch. This is not optional.
The full process typically takes under an hour if the replacement screen is the right part and the ribbon cable goes in cleanly.
What changes after replacement
Three things, none surprising.
Exposure times will need recalibration. The new screen will almost certainly require shorter exposures than the degraded old one was using. The difference can be significant. Run an exposure test immediately after replacement before committing resin to a real print.
First-layer adhesion behaviour returns to the printer’s original performance. If adhesion problems were the first symptom of the declining screen, this is the most satisfying part of the fix.
The failed-print rate drops back to normal. Problems that were being misattributed to resin, FEP, or settings will resolve once the exposure source is consistent again. If problems persist after replacement, they have a different cause.
How to make a screen last longer
The rated 2 000-hour figure is not a fixed ceiling. Three habits extend screen life in practice.
Avoid consecutive prints without a cool-down. The LCD generates heat during a print, and heat degrades the mono panel’s pixels over time. Running print after print back to back accelerates wear. Between prints, particularly long ones, allow the printer to sit idle for a few minutes before starting the next run.
Empty the VAT between sessions. Resin sitting on a screen overnight can seep under the FEP edges and leave residue that settles on the LCD surface. The residue is not immediately damaging, but repeated exposure builds up. Filter resin back into its bottle after each session rather than leaving it in the machine.
Keep the printer away from sunlight. UV from sunlight degrades the LCD’s polariser layer just as effectively as it cures resin. A printer sitting in a sunny window ages the screen from outside even when it is not printing. The same applies to ambient UV from uncovered fluorescent or certain LED sources. Keep the printer covered when not in use, and keep it out of direct or indirect sunlight.
The summary
The LCD screen is the cheapest component in a resin printer to replace and the one most worth replacing. Budget for at least one replacement over the life of the machine if you print regularly. For a hobbyist printing a few times a week, two to three years is a reasonable interval to keep in mind, though many screens run longer under good conditions.
When symptoms appear, work through the diagnostic steps before spending money. Replaced FEP and re-levelled plate first. Screen test to confirm. Then replace the screen if the test shows degradation.
If you have a more recent machine with good bones, a screen replacement at the two-year mark is almost always worth doing. If the machine is older and other components are showing wear, look at the resin printer buying guide alongside the replacement cost and make the call honestly. The screen is not always the answer. Sometimes the printer has done its job.

