Some links on this page are affiliate links — marked with aff — and if you buy through them I may earn a small commission at no extra cost to you. Read the full disclosure.
The most common answer to “how long does resin printing take?” is “about five hours for a Marine”. That answer is wrong, and it is wrong in a way that misleads beginners into thinking print time scales with model count. It does not. Print time is dominated by layer count, which is determined by the height of the tallest model on the plate and the layer thickness you chose in the slicer. Twelve Marines on a plate take almost exactly the same time as one Marine at the same height. The real answer is more useful and, honestly, a bit more boring.
The single biggest factor: layer count
The printer does not care how many models are on the plate. It exposes one layer at a time, and the screen illuminates the entire build area simultaneously. Whether the layer contains one model or twelve, the printer fires the UV light once, lifts the build plate, and moves to the next layer.
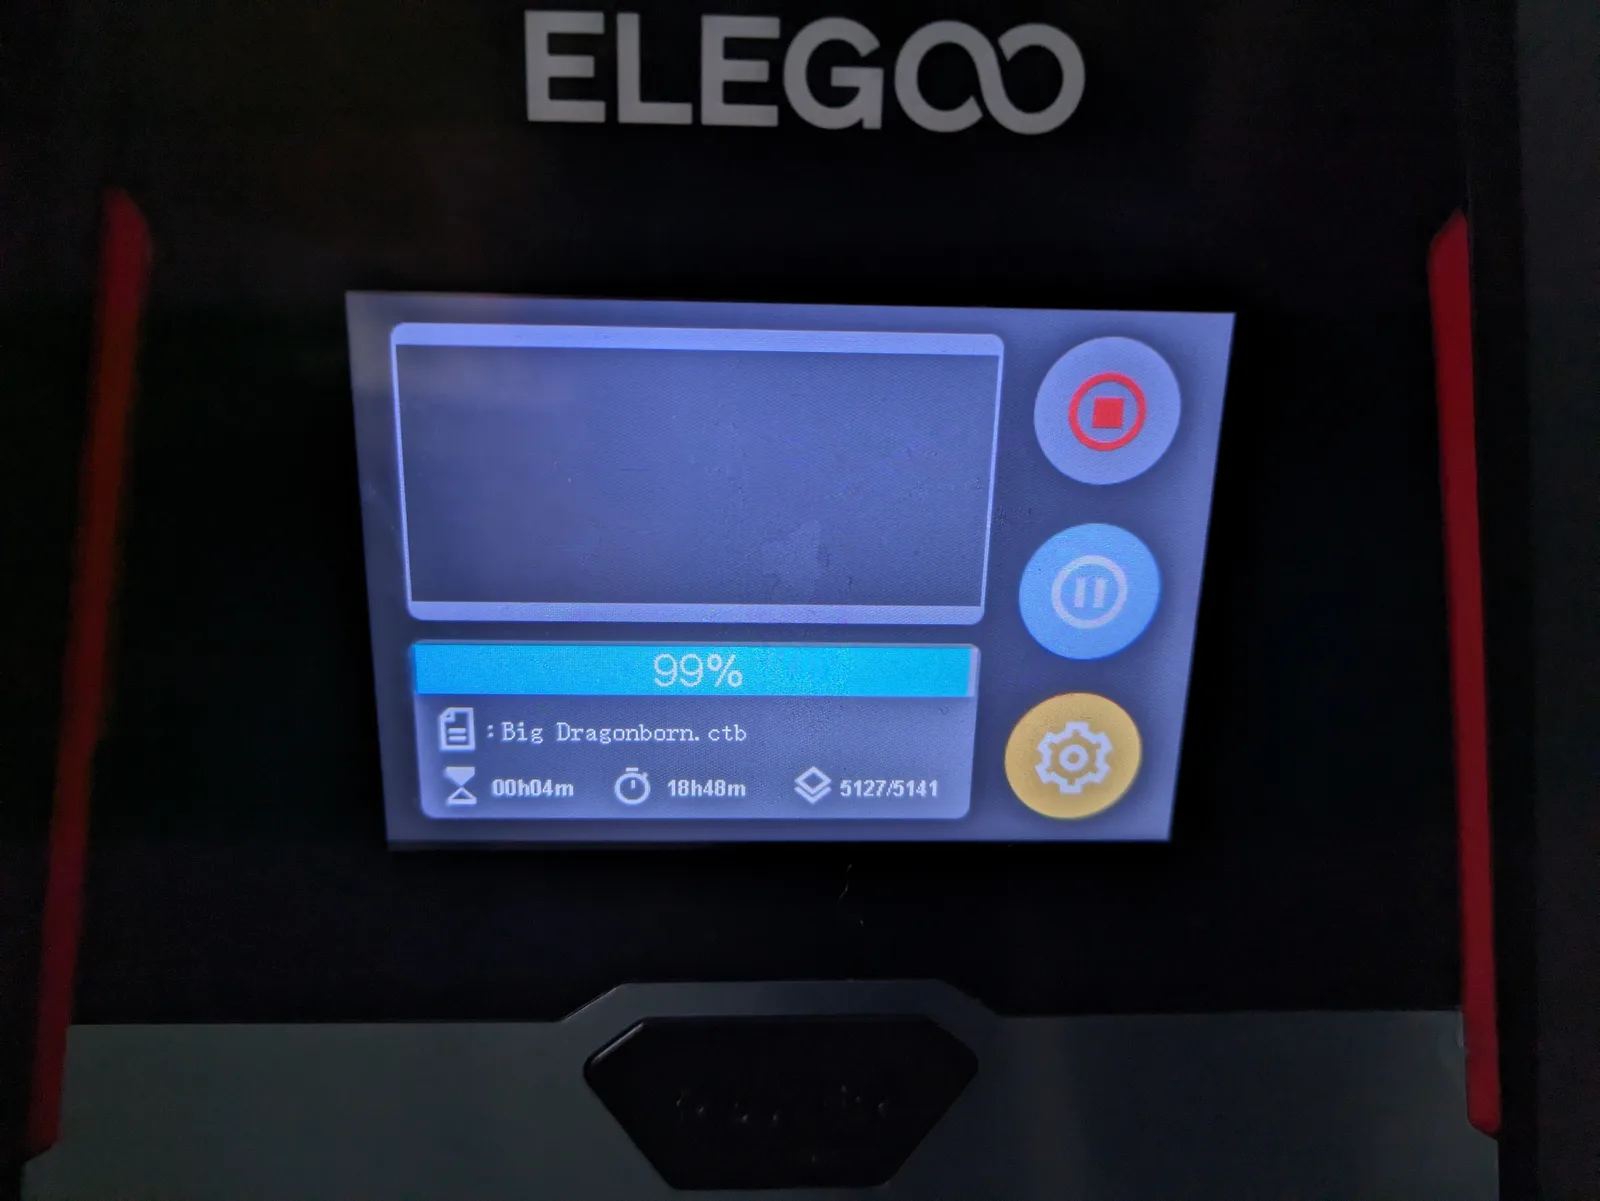
Layer count is calculated from two numbers: the height of the tallest model on the plate, and the layer thickness set in the slicer. A 30 mm infantry model printed at 50 micron layer height produces 600 layers. The same model at 30 micron layer height produces 1 000 layers. Multiply either number by the time per layer and you have the print time.
That is the whole formula. Everything else is detail.
Layer thickness and what it costs you
Most miniature work runs at 30 to 50 micron layer height. Below 30 micron the quality gains become difficult to see after priming and painting. Above 50 micron the stair-stepping effect on curved surfaces becomes visible. The practical range for paintable detail is 30 to 40 micron.
Choosing 30 micron over 50 micron adds roughly two thirds more layers to the same print. On a four hour print at 50 micron, that same model at 30 micron takes around six to seven hours. The trade is detail for time, and for most miniatures 40 micron is the sweet spot where you get very good surface quality without the extra time cost.
Why batching is close to free
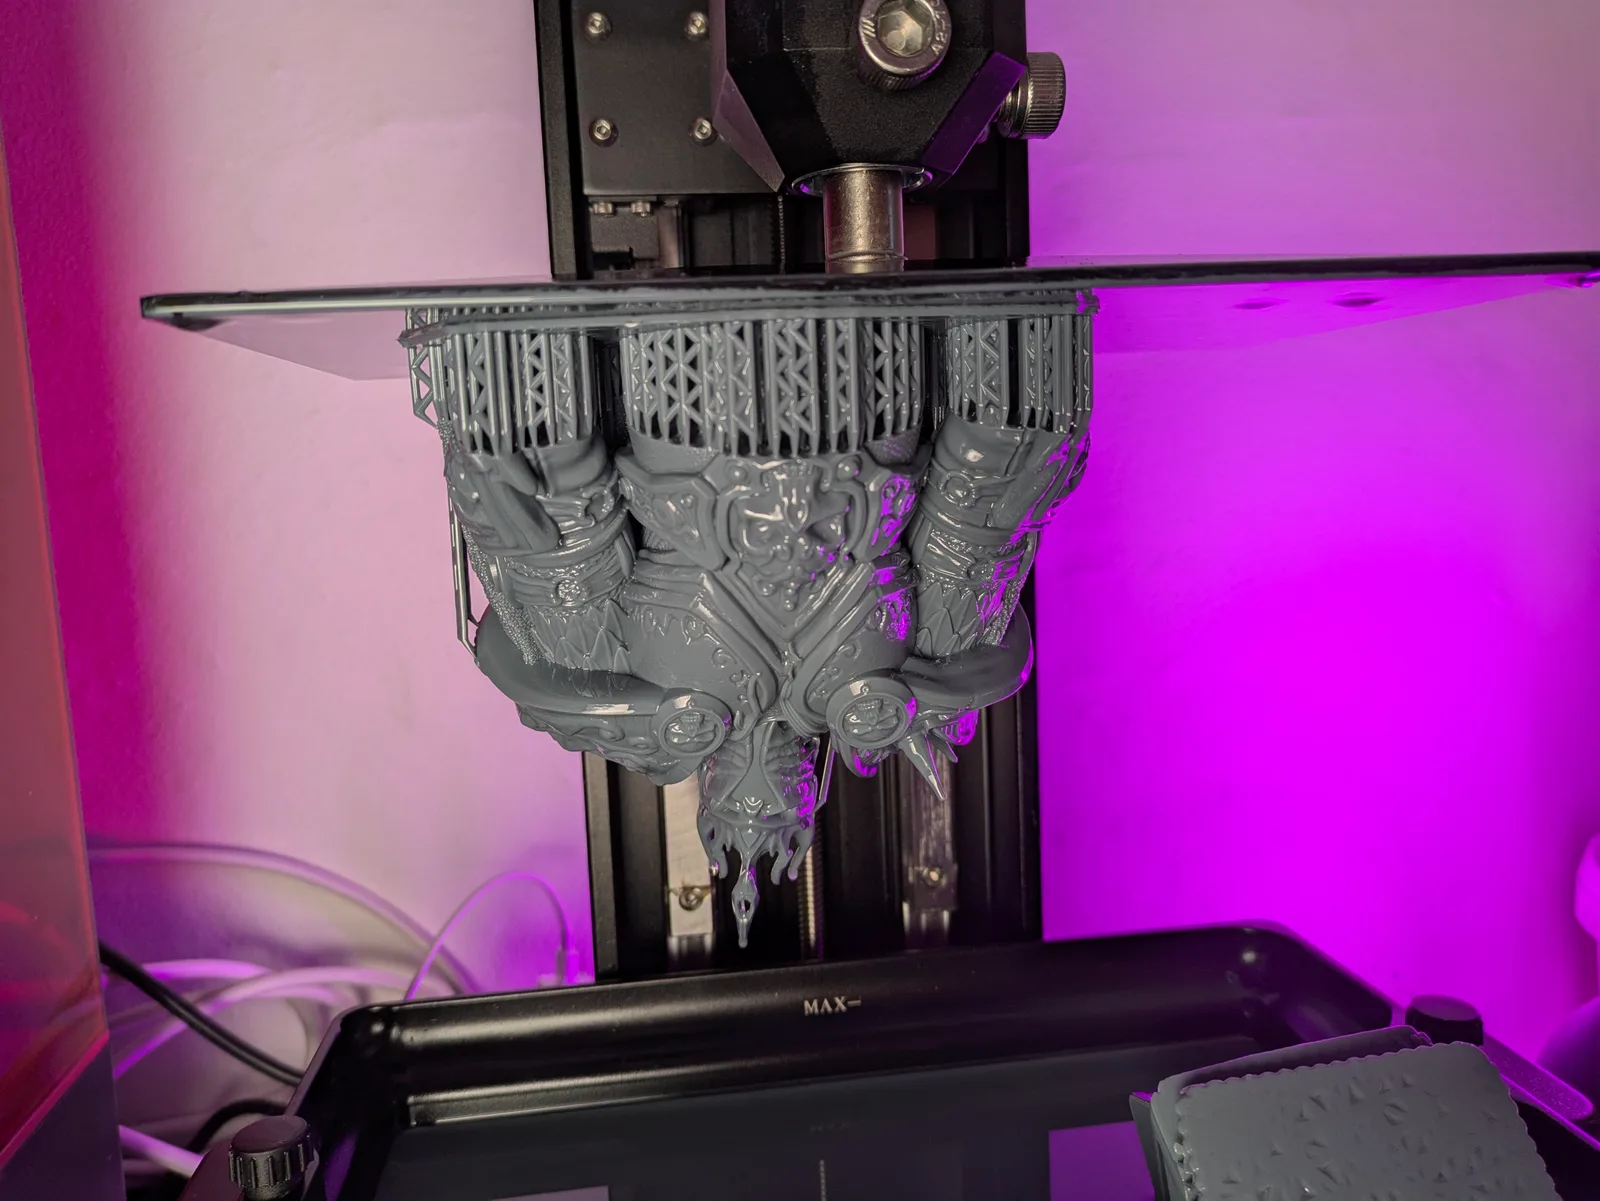
This is the part most beginners miss. Twelve Marines on a plate take roughly the same time as one Marine, provided the tallest model is the same height. The layer count does not change when you add more models because each layer still only exposes one slice of the same print height.
The correct mental model is: print time scales with the tallest model on the plate, not with the number of models. Adding models to a plate is close to free as long as you are not raising the height of the print. Fill the plate. The time cost is negligible.
The practical exception is if you add a tall hero model to a plate of infantry. The hero is taller than the infantry, so the infantry plate now runs for the hero’s full print time. That is not a batching win; that is the hero slowing everything down. Batch heroes separately.
Real numbers, by setup
These figures assume 40 micron layer height, a standard 28 to 30 mm infantry model, and a factory profile from the slicer. All times are for a full plate of infantry at that height.
Elegoo Mars 5 Ultraaff (tilt VAT, 18 micron pixels): roughly 3 to 4 hours per plate. The tilting VAT mechanism reduces the peel force at each layer, which shortens the lift cycle. This is the Mars-class machine to own if print speed matters to you.
Elegoo Saturn 3aff (static peel, 24 micron pixels): roughly 5 to 6 hours per plate. The Saturn 3 is a reliable and fairly priced machine, but static peel requires a longer pause at each layer for the print to release from the FEP. That time adds up across 750 layers.
Elegoo Saturn 4 Ultraaff (tilt VAT, 24 micron pixels): roughly 3 to 4 hours per plate. Same tilt VAT advantage as the Mars 5 Ultra on a Saturn-class build plate. For painters who want to batch eight to sixteen infantry in one overnight run, this is the more comfortable machine.
A 75 mm dragon at 40 micron: roughly 8 to 12 hours regardless of which printer you are using. A model that tall produces 1 875 layers at 40 micron. No tilt VAT mechanism makes that fast. This is an overnight print, full stop.
Why tilt VAT printers print faster
Static-peel printers separate the cured layer from the FEP film by pulling the build plate straight up. That peel force can be significant, which means the printer waits a few extra seconds per layer to let the resin flow back before the next exposure. On a 750-layer print, those extra seconds add up to an hour or more.
Tilt VAT printers solve the problem differently. Instead of pulling straight up, the VAT rotates slightly at an angle, which peels the cured layer away progressively from one edge rather than all at once. The force required is much lower, and the wait time per layer drops to around 2 to 3 seconds rather than 4 to 5 seconds on a static peel machine. Across a 750-layer print that difference is roughly 25 to 30 minutes of saved time, on top of whatever else the lift profile saves.
Elegoo chased speed by tilting the VAT and keeping the 18 micron pixel size on the Mars 5 Ultra. The result is a printer that prints quickly without the quality compromises that come with other approaches to speed printing. The comparison between these machines is covered in more detail in the Elegoo Mars 4 Ultra vs Mars 5 Ultra article and the Elegoo Saturn 3 vs Saturn 4 Ultra comparison.
The variables that change your print time
Layer thickness and printer type are the two biggest factors, but several others are worth knowing.
Resin temperature. Cold resin is thicker and takes longer to cure properly. In a cold room or shed, you may need to increase exposure time per layer, which adds to the total. Heated printing chambers exist on some machines, but for most printers the practical answer is to not print in a room below 15 degrees Celsius, or to warm the resin bottle before printing.
LCD age. UV output from the LCD diminishes over time. An older screen may require longer exposure settings to achieve the same cure depth. Longer exposure per layer means longer total print time. Running a resin exposure test (RERF) occasionally will tell you whether your screen is degrading and whether you need to adjust.
Anti aliasing. Many modern slicers and printers support anti aliasing to smooth the edges of each layer. AA adds a small per-layer processing overhead. On a 750-layer print the total is usually under a few minutes, but it is worth knowing the setting exists and that it is not free.
Light uniformity. The screen is brightest and most uniform at the centre. Models placed near the edges of the build plate may receive slightly less UV energy, which the slicer may compensate for with adjusted exposure. This is unlikely to affect print time noticeably, but it does affect quality and is why packing models toward the centre of the plate is better practice.
The realistic batch cycle
The total time for a print run involves more than the print itself. Here is a realistic breakdown for a standard overnight batch.
Slicing and queuing: 15 to 30 minutes in the evening. Open the slicer, load the files, check the orientation, add any missing supports, run auto-arrange, slice, copy to the printer.
Print time: 3 to 12 hours, usually running overnight. For infantry-scale models on a Mars-class printer, you are looking at the lower end of that range. For a tall hero model or a dragon, you are looking at the upper end.
Washing: 10 minutes in an IPA wash station. More detail on this in how to start resin printing miniatures.
Draining and curing: 20 minutes. The wash station drains and the cure station runs its cycle.
Total human time per batch: roughly 30 to 60 minutes spread across two sessions, one in the evening and one the following morning. The printer itself does the work; you just set it up and collect the result.
What “printing overnight” actually means in practice
The print time figures in the section above sound long until you stop thinking about them as hours of your time. A 5 hour print on a Saturn 3 is not 5 hours of your attention. It is 20 minutes of your evening (slicing and queueing), then the printer runs while you sleep, then 20 minutes the next morning (washing and curing). The five hours of print time are not five hours of work; they are five hours of the printer doing its job unattended.
The workflow that makes resin printing sustainable is treating it like a slow cooker. You set it up before bed. You collect the result after breakfast. For a regular painter who prints a batch of infantry every few days, this rhythm becomes completely unremarkable.
When print time actually becomes a problem
Most of the time, “how long does this print take?” is not the question that matters. The print happens overnight; you were asleep anyway. There are two situations where print time genuinely constrains you.
Same-day urgency. You need models for a game tomorrow evening. An 8 to 12 hour print, plus washing and curing, plus the drying time before primer, plus painting, is too long to fit into one day unless you start very early in the morning. If you are printing for a deadline that is less than 24 hours away, the print time is a hard constraint. The answer is to print the night before, not the morning of.
Hero model focus. A single tall hero model can take 8 to 12 hours and only produce one model. That is a bad trade of plate time for output. The usual approach is to either batch hero-scale models together (three to four heroes on a plate is still one overnight print), or to print the hero on the same night as an infantry batch running on a second printer.
The summary
Print time for a standard plate of 28 to 30 mm infantry runs roughly 3 to 6 hours depending on the printer. That print happens overnight. The total human time involved is under an hour across two sessions. Large models at 75 mm or above take 8 to 12 hours, which is still an overnight print, just a longer one.
The question “how long does resin printing take?” mostly answers itself once you have one overnight cycle under your belt. The printer works while you sleep. The models are ready in the morning. Plan the plate the night before and the time cost disappears into the background.
For a full introduction to how resin printing works and what to expect in your first few months, start with resin 3D printing for miniatures. For advice on how to use all that overnight print time efficiently by packing the plate properly, see how to fill a build plate efficiently. For guidance on model orientation and how it affects both support placement and print time, see resin print orientation for miniatures.

